Panoramic Photography at Lake Powell
by David Herberg
Return to main Lake Powell page
Arranged roughly from North to South. Click on any image to enlarge.
Due to the large size of these image files, this page is best viewed with a broadband Internet connection and to see anything at all you need to have Javascript enabled in your browser.
Hite Marina at low water (681 KB)
Trachyte Creek anchorage (443 KB)
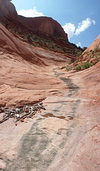
Ephemeral confluence off Trachyte Creek (495 KB) Mouseover to see the two incoming streams and the combined outflow.

Moonrise over Good Hope Bay (80 KB)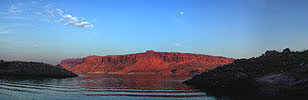 |
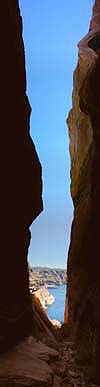
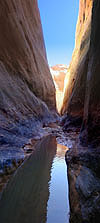
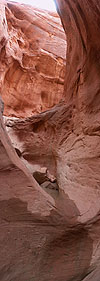
 Slot canyon off Forgotten Canyon (150 KB) |
|
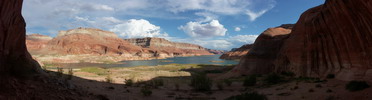
A complete view of Bullfrog Bay (799 KB) Mouseover to see certain facilities captioned.

Sand dune in Bullfrog Creek (185 KB)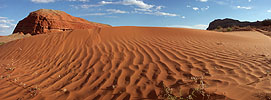
|
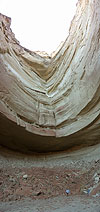
Waterpocket Fold and Halls Creek (377 KB) 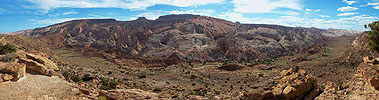
|
|
Sunrise in Halls Bay (50 KB) 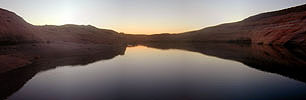 |
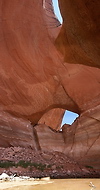
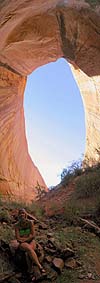
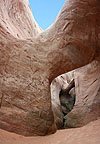
Alice J Arch just off the main channel (330 KB) 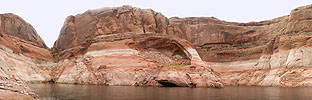 |
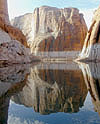
Natural dam in Iceberg Canyon (390 KB) |
Lunch in Dougs Cathedral (218 KB) | ||
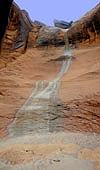
Streambed in Iceberg Canyon (272 KB)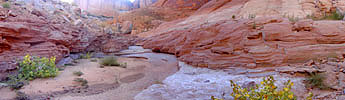 |
Streambed in Iceberg Canyon (93 KB) 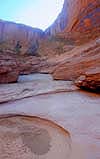 |
||
Iceberg Morning (167 KB) | |||
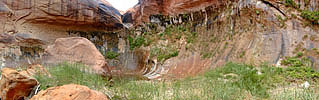
Floor of Dougs Cathedral (493 KB)

Dryfall (102 KB) | Balanced Rock (162 KB) |
The end of Long Canyon (352 KB)
The Escalante River (312 KB)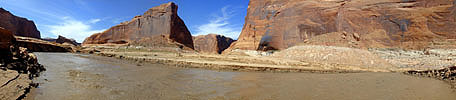 |
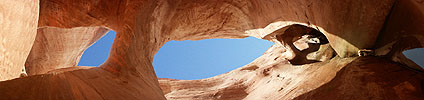
Lower story of Cathedral in the Desert (148 KB) |
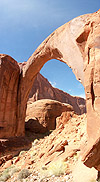
 La Gorce Arch (275 KB) |
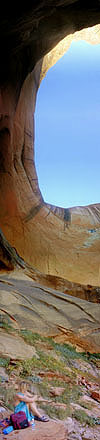
The entrance to the Cathedral in the Desert (237 KB) |
Navigable “sea cave” in 50-Mile Canyon (83 KB) |

Upper story of Cathedral in the Desert (466 KB) |
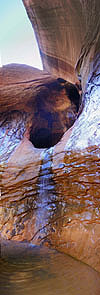
Waterfall above Cathedral in the Desert (222 KB) |
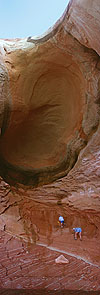
Another cave in Willow Creek (130 KB) 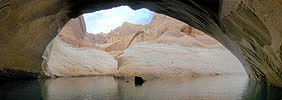 |
||
Yet another one in Davis Gulch (141 KB)  |
Explorer Junction (581 KB)

Dawn breaks on Hole-in-the-Rock (470 KB)

From the top of Hole-in-the-Rock (150 KB)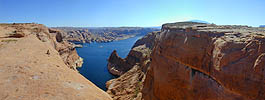 |
|
 Down in Hole-in- the-Rock (90 KB) |
||
| Narrow canyon off Cottonwood Canyon (141 KB) |
||||
The Golden Arches (253 KB) |
||||
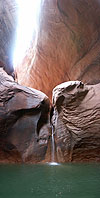
Waterfall in Wilson Creek (421 KB)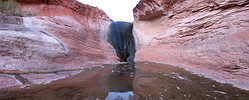 |
|
|
Oak Bay and the main channel (700 KB)

The Sphinxette dodges a storm (331 KB)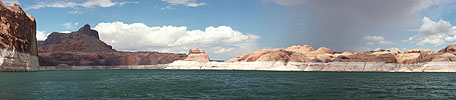 |
Sunrise on the Sphinxette (319 KB)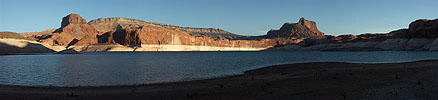 |
||||
Twilight Arch in Twilight Canyon (257 KB) 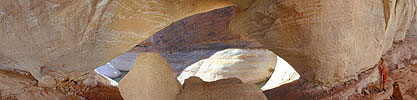 |
 Slot in Twilight Canyon (138 KB) |
||||
|
|||||
In 2003 (181 KB) |
 In 2004 In 2004(141 KB) |
||||
Vertical panorama in Anasazi Canyon, 2003 (206 KB)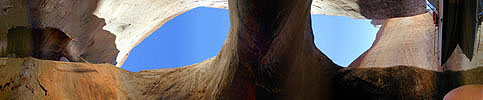 |
Vertical panorama in Anasazi Canyon, 2004 (298 KB) |
|
Waterfall in Anasazi Canyon (411 KB) 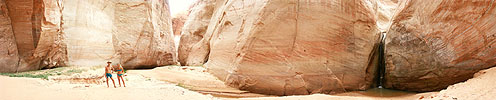 |
||
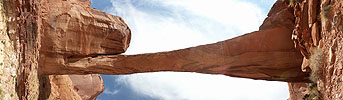
Rainbow Bridge (318 KB)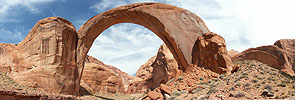 |
 Rainbow Bridge vertical panorama (280 KB) |
 Rainbow Bridge flying over (277 KB) |
||
Rainbow Bridge from underneath (298 KB) |
300 degree panorama from Balanced Rock Canyon (982 KB)

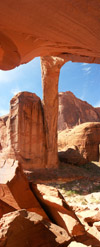
 Navigable arch in Rock Creek Bay (169 KB) |
Another view of the arch in Rock Creek Bay (85 KB) 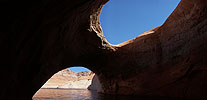 |
 The end of the hike in Cascade Canyon (261 KB) |
 Undercut vertical cliffs in Last Chance Bay (216 KB) |
||
Navigable “sea cave” in Cascade Canyon (167 KB) 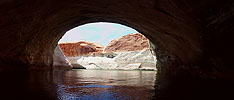 |
View from under the Morrison overhang (270 KB)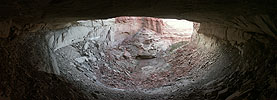 |
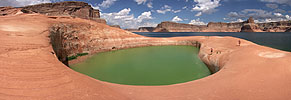
Pothole and pool in Last Chance Bay (145 KB) |
|
Storm and rainbow in Last Chance Bay (134 KB) 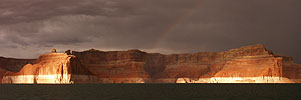 | Sunrise near Rock Creek Bay (183 KB) 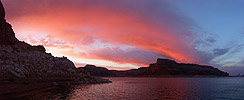 |
 Cleaning graffiti from a cave in Rock Creek Bay (249 KB) |
Storm spotlight in Last Chance Bay (310 KB) |
360-degree view of Padre Bay (951 KB)
View from Padre Butte (336 KB)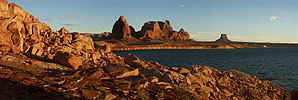 |
Sunset fire on Gusight Butte (198 KB) |
|
Double rainbow and Gregory Butte (107 KB) 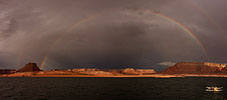 |
Glowing rocks across Padre Bay (333 KB)  |
Silhouetted Padre Butte (134 KB) 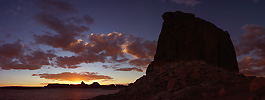 |
Sunrise on Wahweap Bay (162 KB)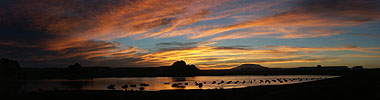 |
||
Wahweap (352 KB)  |
||
Dam, bridge, and powerhouse (203 KB) 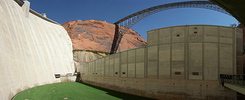 |
Horseshoe Bend (173 KB) 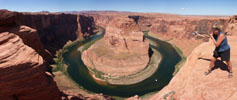 |
|
|
Each of the panoramic photographs presented here started out as a series of adjacent and overlapping individual panels. Each panorama comprises anywhere from 2 up to 24 such original photos. They were stitched together into a single continuous view using one of two software tools, the specifics of which I'll get to in a moment. Although the resulting panel alignment is not as seamless as that produced by a true swinging panoramic camera, each program's price ($130) is considerably more attractive than that of the least expensive digital panoramic camera I have been able to find ($13,600). Sometimes I match densities using Photoshop before stitching, and sometimes I have to send the stitched result back to Photoshop if I got too wild with vertical error when capturing the original scene. The tool I now favor is called Panorama Factory, but I have also used PanaVue ImageAssembler. Both tools have undergone vast improvements in the past couple of years, and now attempt to allow for the frame-to-frame variations inherent with a hand-held series. For both programs, I only use the more labor-intensive manual stitching modes because of the resulting superior pixel alignment. I currently favor Panorama Factory because of its simpler human interface, its fine-tuning algorithm, and its quicker method of alignment flag placement. Each program is undergoing continuous improvement, so watch this space for any leapfrogging news. Some hints for more successful panorama creation: It is crucial that all the original photos are taken from the same point in space. Otherwise near objects line up differently against distant objects, and it is mathematically impossible to align the images later. A tripod really helps here, with the side benefits of sharper original panels and of lowering the panel-to-panel vertical misalignment or rotatation, which neither program is very good at correcting. It is also better to disable your camera's automatic exposure and color balance, and manually adjust the exact same settings for each original photgraph for better control of the color matching when the panorama is blended. Both tools can match exposures after the fact, but the results have been less than satisfactory for me. Although the tools can align adjacent panels with as little as 10% or as much as 90% overlap, I have found that a 50% overlap between panels works well for me. And finally, if some object in your scene is in motion, try to capture it in the center of one of the panels, and then avoid capturing it in adjacent panels. Obviously, this requires that you end up with less than 50% overlap. To maximize the overlap, a speedy camera is helpful. |
| You are visitor | since April 14, 2003 |